Classic British Scones
There are few things that feel more like home to me than freshly baked British scones, still slightly warm from the oven and served with jam and cream.
These are the scones I grew up with. My grandma taught me to make them by feel—throwing all the ingredients in without weighing a thing, gently bringing the dough together, adding a little more milk if it needed it, and never fussing with it too much. She’d serve hers with a thick slab of butter before adding the jam and cream, which is still one of my favorite ways to eat them.
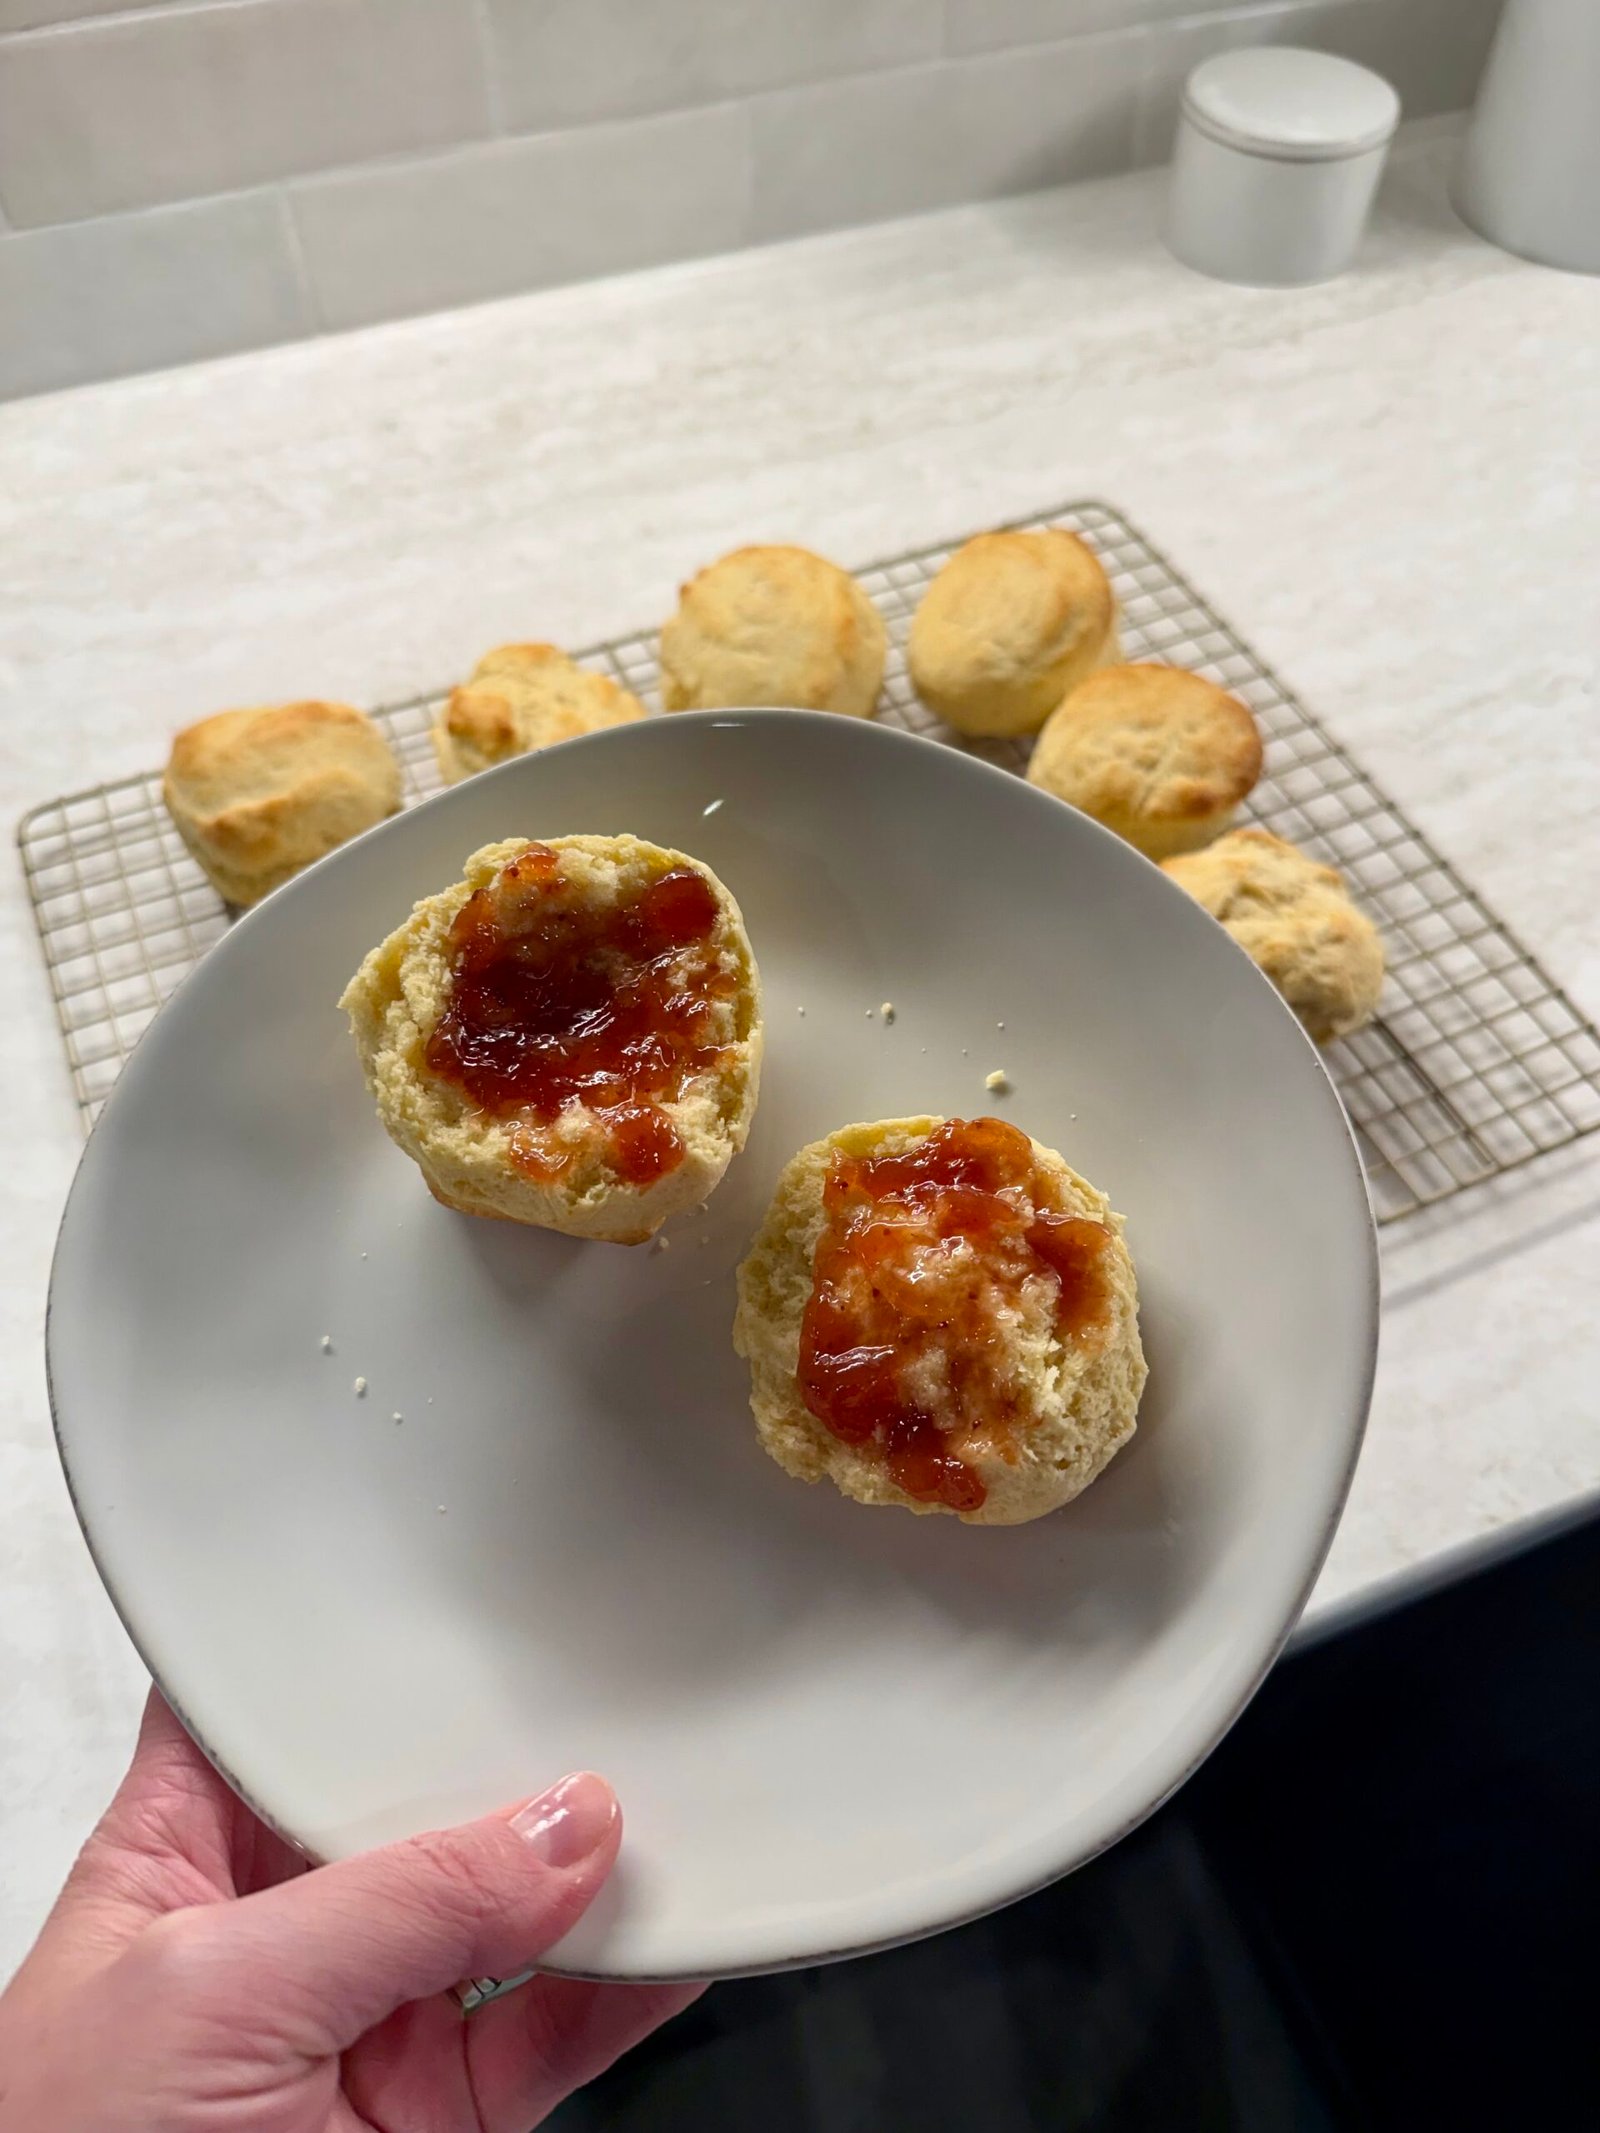
Since moving to America, I’ve adapted the recipe using ingredients readily available here and tested it in my Colorado kitchen at 8,600 feet. The result is a classic British scone that’s light, soft, and fluffy inside, with a gently golden top.
What Makes a British Scone Different?
If you’re used to American scones, traditional British scones are quite different. Rather than being rich, sweet, and often filled with chocolate or other flavors, British scones are simpler and much less sweet.
They’re soft and fluffy inside, with a lightly golden exterior, and are usually split in half and served with jam and clotted cream. Think of them less as a sweet pastry and more as the foundation for a proper cream tea.
British scones are also traditionally cut into rounds rather than shaped into wedges.
British Baking, American Ingredients
One of the first things I discovered when I started baking British recipes in America was that even familiar ingredients aren’t always quite the same.
Traditional British scone recipes often call for self-raising flour. For this recipe, I use American all-purpose flour and baking powder, so there’s no need to track down British flour or make a separate batch of self-raising flour.
I’ve included metric measurements alongside familiar American equivalents where helpful. I still prefer weighing ingredients for baking because it gives me the most consistent results, but you shouldn’t need a cupboard full of British ingredients to make a proper scone.
Baking Classic British Scones at High Altitude
I developed and tested this recipe at approximately 8,600 feet in the Colorado mountains, where the lower air pressure and dry climate can affect how doughs rise and retain moisture.
At this elevation, I use 4 teaspoons of baking powder for 450 g of flour, along with a mixture of eggs and milk. The dough should be soft and slightly sticky rather than dry or crumbly.
The most important thing is to judge the dough by feel. Depending on your flour and the conditions in your kitchen, you may need a little additional milk to bring everything together.
If you’re baking at a lower elevation, the dough may require slightly different amounts of liquid and leavening. See the recipe notes for guidance, or visit my High-Altitude Baking Guide for more information.
My Tips for Light, Fluffy Scones
Scones aren’t difficult to make, but a few small details make the difference between a light, fluffy scone and a dense one.
Keep everything cold. Use cold butter and milk, and work fairly quickly so the butter doesn’t become too warm.
Don’t make the dough too dry. This is probably the biggest lesson I learned from my grandma. Scone dough should be soft and slightly sticky. If it’s still crumbly, add another splash of milk.
Handle it as little as possible. Bring the dough together gently and pat it out with your hands rather than kneading or repeatedly rolling.
Cut straight down. Dip your cutter in flour, press straight through the dough, and lift it back up without twisting.
Brush the tops, not the sides. Milk or beaten egg gives the scones a lovely golden finish, but avoid letting it run down the cut edges.
Don’t overbake them. Remove the scones once they’ve risen well and are lightly golden. The centers should remain beautifully soft.
How to Serve British Scones
British scones are best served fresh and still slightly warm, split in half and generously topped with strawberry jam and clotted cream.
Clotted cream can be difficult to find in American grocery stores. If you can’t get hold of it, mascarpone or lightly whipped heavy cream makes a good alternative.
And then there’s my grandma’s way: butter first—and plenty of it! She’d add a thick slab of butter before the jam and cream, and I still think it’s one of the best ways to eat a freshly baked scone.
For a savory version, try my British Cheese Scones, made with plenty of sharp cheddar and a little extra cheese on top.
Classic British Scones
Ingredients
Equipment
Method
- Preheat the oven to 425°F (220°C). Line a large baking sheet with parchment paper.
- In a large bowl, whisk together the flour, baking powder, salt, and sugar.
- Add the cold, cubed butter. Using your fingertips, lightly rub the butter into the flour until the mixture resembles fine breadcrumbs. Keep everything as cold as possible and avoid overworking it.
- Crack the eggs into a measuring jug and beat lightly. Add enough cold whole milk to bring the total volume of the eggs and milk to 285 ml.
- Gradually stir the egg and milk mixture into the flour until the dough begins to come together. If it still feels dry or crumbly, add another splash of cold milk at a time until you have a soft, slightly sticky dough.
- Turn the dough onto a lightly floured work surface and gently pat it out to approximately ¾ inch (2 cm) thick. There's no need for a rolling pin—just squish it out gently with your hands.
- Dip a 2½-inch (6 cm) round cutter in flour and press it straight down through the dough, then lift it straight back up. Do not twist the cutter, as this can prevent the scones from rising properly.
- Transfer the scones to the prepared baking sheet, placing them fairly close together.
- Brush only the tops with a little milk or beaten egg, avoiding the sides.
- Bake for 13–15 minutes, until well risen with lightly golden tops and bottoms. The tops should spring back when gently pressed. For an extra check, you can use an instant-read thermometer – the centers should reach approximately 200–205°F (93–96°C).
- Transfer the scones to a wire rack and allow them to cool for about 10–15 minutes before serving, giving the crumb time to finish setting.
Notes
Want more recipes like this?
Get new British-inspired recipes and high-altitude baking tips straight to your inbox.